Enterprise Federation using VMware Workspace One Access Connector
Enterprise Federation using VMware Workspace One Access Connector
Workspace One Access Connector.
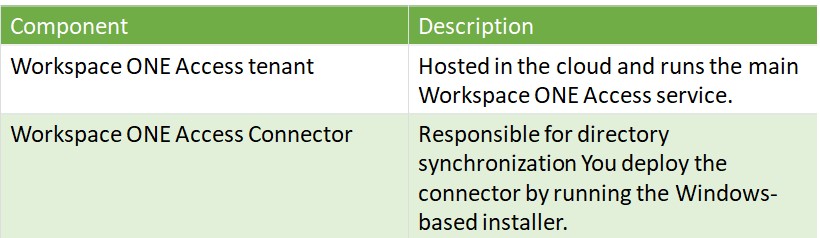
VMware Workspace ONE Access was formerly called VMware Identity Manager. It is Responsible for directory synchronization and handles some of the authentication methods between on-premises resources such as Active Directory, VMware Horizon, Citrix, and the Workspace ONE Access service.
The main components of a cloud-based Workspace ONE Access implementation are described in the following table.
Please
note that to perform the federation, the organization Owner needs to kick the federated setup from CSP and then
can assign an Enterprise Admin role to manage the directory service and identity
providers.

Authentication flow using IDP and vIDM.

The four services of the Workspace ONE Access Connector

Key requirements for the Deployment:
1). Org Owner of CSP to kick-start the federation setup from CSP and assign Enterprise Admin to manage the directory services and identity providers.
2). Latest Windows Server.
3). Latest Connector which can be downloaded from VMware Customer Connect Portal.
4). Service Account to be used to authenticate with AD.
5). Open Firewall rules from a windows box to domain controller and CSP tenant.
Workspace One connector Deployment:
- Deploy Workspace One connector on a windows box.
- Download the executable from VMware Customer connect portal or during the setup of Enterprise federation when it gives the option to Install the connector.
Link to download from customer connect portal:


- Depending upon the services used, install the services.

- Go to CSP and from Enterprise federation Org download the Config file by clicking on Step2 to start the connector install.

- Keep Config file and password handy as this will be used to establish the connectivity between CSP and Workspace One connector.

- Browse to the location where the config file is saved and select the file. Enter the Password of the file.

- Enter Proxy information if it is used to connect to the internet from the server.

- If there is any Syslog server use, enter the details of sys log server or skip.

- If any root Certificate is used, upload the certificate here, and if not click next


- Specify Ports:

- Click Install and wait for the installation to finish.

- Once the connector is installed go to Services.msc to check the installed services are in a running state.

Configuring CSP Federation post Workspace One Connector Installation:
Pre
Connector installation steps:
Ø Start the Self-Service Federation Setup:
Ø Verify Domains: In this step, you verify the ownership of the
domains that you want to federate. The verification process involves adding DNS
TXT records for your domains. Before you begin, verify that you can modify the
DNS records for your corporate domains.


Ø Install Workspace One Access Connector: In this step, you download
the Workspace ONE Access connector executable
file and install it on a Windows machine with access to your enterprise
directory.
Post Connector installation steps:
Ø Sync
groups and users: In this step, you bind to your enterprise Active Directory. If
necessary, upload security certificates for SSL/TLS communication from
the Workspace ONE Access connector to the
Active Directory.


Ø Configure the Identity Provider (PING or some other).

Ø Complete Setup :
In this final
step of the federation setup, you must perform a list of actions.
- Validate
that the users from your enterprise can log in to VMware
Cloud services by using your corporate IdP.
- Notify
the enterprise users of the domains that you specified in Step 1 that they have
to log in to VMware Cloud services by
using their corporate credentials.
- Acknowledge
the changes and enable the federation for your enterprise.
After you complete the federation setup, the self-service
workflow is no longer available for changes. Enterprise Administrators can
modify the initial setup from the Enterprise
Federation dashboard.

Ø Add Active Directory Groups to Custom Groups in each Organization
Ø Test login and Link VMware ID Accounts
All existing users
of VMware Cloud services who used to access their services using a
VMware ID account must link their VMware ID to their federated account. This step has to
be completed when you first log in to Cloud Services Console with
your federated account after the federation setup for your corporate domain has
been completed.

Ø Email Invite to users: All the users who are synced as part of the above process will receive an email invite notification from CSP and then they have to log in to CSP portal to validate the access. New users synced with your corporate domain post federation don't need to have a VMware ID unless they need to view billing information or file support tickets. In this case, they have to create a VMware account first, and then link their VMware ID to their federated account.

Ø Once logged in, it will take you to your identity provider to register yourself. Follow the instructions on the identity provider screen and proceed with the login.

Comments
Post a Comment